Tips From a Scared Dumbass: You Too Can Upgrade Your WordPress Site: Part Two
Last week, I reported that I was trying to run some WordPress upgrades on Curatti. This is something I’d previously paid others to do for me. Click here to read part one.
I’ll spell out how things went while reporting here that all turned out good in the end.
Recap/Prep
This is simple:
- Always create a Backup Point BEFORE you start any work
- If what you’re doing is extensive, use a Dev or Staging environment
- If you’re upgrading plugins, make sure you have access to your license keys
BEFORE YOU START: It’s important that you only refresh a Production Website during low traffic times. By all means, do your testing during the week, but always fear and plan for the worst case. Make major changes when your visitor count is at its lowest – probably the weekend if you’re B2B like us.
Getting Started
I don’t know why. I also don’t particularly care why. But I wasn’t able to copy our Production environment to the native Staging area. No big deal. WP Engine makes it really easy to create new environments, so that’s what I did. There was a button that said, “Create Staging”. Easy!
After doing that, I set up a Backup Point in Prod.
Next, I clicked the Copy Environment button

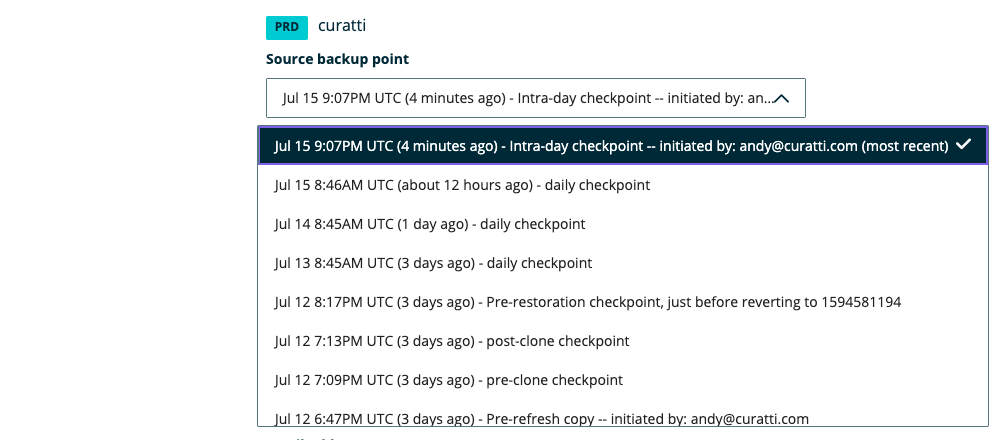
This was the next screen. (ignore the backup date. I just recreated this because I didn’t capture screenshots as I went along):

I clicked on the latest snapshot. But you do have the option of using a different backup point:
It wasn’t too long until I was up and working in the new environment.
Ready To Start Updating
Without knowing or checking whether it was necessary, I did a backup before starting any work. And later, I was happy for it.
I first upgraded the WordPress version, then all of the plugins that were out of date.
The result was… strange

This appeared on every internal page, meaning, the Home Page was fine.
The blue and grey rectangles you see were in constant motion, to show that something was happening. Only, nothing actually did happen! I kept working on other things, waiting for whatever it was supposedly working on to end.
By clicking on the active image, I was able to do a Google search of what might be causing it. The search result was baffling! It said it was a Broken Link checker. Hmmm. I know we tried one of those some time back. I didn’t remember why, but I was quite sure we backed it out. (More on that later.). Was it still around and hiding? A ridiculous thought, of course, but try not to think that if Google pointed you in that direction!
It was time for me to run a restore. (See above screenshot.)
I alluded to this in last week’s article, this is where the Purge All Caches function is SO important! After my restore, I still had the error screen! HELP!
Second Attempt
Patience! If you’re in a big hurry, the type that could lead you to being tempted to take shortcuts, don’t attempt any site work. It’s honestly not worth it.
Honestly, this was really my third attempt. My second attempt was neither well thought out nor well documented, so I did another restore and got back on with things.
I upgraded the WordPress version and took a backup before proceeding to upgrade the plugins. By now, I had isolated 4 plugins that I couldn’t upgrade, so I unchecked those.
Important note: Not all plugins are compatible with WordPress upgrades
Now, because I naturally had the same weird issue, I had a choice:
- Deactivate all plugins, and reactivate them one at a time to pinpoint which one caused the problem.
- Deactivate one at a time until the problem disappears.
I chose option 2. It seemed to possibly mean less work. Maybe the difference is just psychological. Whatever!
After 10 or so plugins – I had to upgrade 34(!) – I isolated the plugin that caused the issue. I’m not about to publish an article naming a problem plugin. But we don’t need the upgraded version so I just reactivated all plugins except for it, did some important testing, and created a new backup point.
Be aware that some of your upgraded plugins may need to be re-activated.
Run down the list.
It will take you a minute.
From there, I wanted to make a couple of real site upgrades:
New Plugins
I wanted to add 3 new plugins. One survived.
Universal Voice Search
This was the survivor. Shout out to the developers, SpeakToWeb.
You’ll only notice this if your browser is Chrome, as that comes with the free version. If you want the plugin to be active across other browsers, you’ll need to upgrade.
When in Chrome, you’ll see a little microphone symbol in the search box, and a larger, floating one in the right margin.

If you click the sidebar mic, you’ll see this.
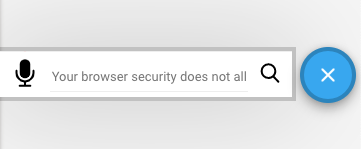
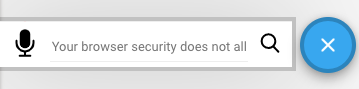
Click on the mic again and you’ll be prompted to allow Curatti to access your mic. If you don’t allow it, you’ll still be able to type your search, but you’ll see this:
I can tell you though, this works, and I love it!
Broken Link Checker
The reviews on this were mixed. They ranged from
“This is the best ever”
To
“DON’T USE! THIS KILLS WEBSITE PERFORMANCE!!!”
I decided to go for it. A day after I added this into the Staging site, Jan got an email from WP Engine scarily titled:
[wpe-system] Disallowed Plugins Found – curattistaging
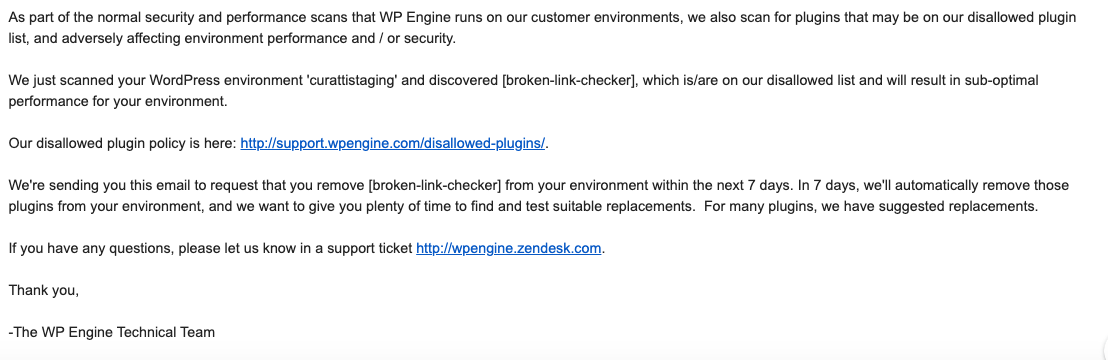
So much for that!
Heyoya
I loved the idea of this! Voice comments? How could that not be great! (There’s also a voice testimonial aspect.)
I’d still suggest that people creating new websites give this a serious look. But there were two reasons we had to back it out:
- It killed our Disqus, without importing existing site comments.
- I really like the community aspect of Disqus and would have loved to have tried out having two commenting platforms.
It didn’t work for Curatti to lose both the community and our old comments.
This is something we’d definitely reconsider in a while, as the concept and benefits appear to be so good! But it’s not something for an established blog to jump into. And either way, we’ll definitely look into the testimonials.
Important Wrap Up Notes
When you’re confident that there are no issues, create a backup in your staging or Dev environment and one of Prod. Follow the steps for copying Prod to non-Prod, but in reverse. Then do another backup of Prod once the copy is complete. You may wonder if this is this necessary. Maybe not. But why not?
Be aware that if you add new plugins added into your non-Prod environment will be activated after you copy them over.
Likewise, any plugins that deactivated when upgraded in you non-Prod environment, may do the same in Prod.
Also, I know you tested everything before copying to Prod, but,
TEST AGAIN!
Any Comments?
I hope this helps you if you decide to undertake an upgrade.
For those of you who have done upgrades, if you have any tips you can impart to your fellow readers, please leave a comment. I will be grateful and hopefully, others will be also.
Sign Up For Our Mailing List
If you’d like to receive more in-depth articles, videos and Infographics in your inbox, please sign up below
Sign up for the newest articles from Curatti, delivered straight to your inbox
Featured image: Copyright: ‘https://www.123rf.com/profile_vanatchanan‘ / 123RF Stock Photo
(Full disclosure: WP Engine is the fourth host we have used. It is easily the best – I mean, not even close! We wouldn’t recommend it if we didn’t love it. But if they have an affiliate link for us to share them with the world, we’ll happily use it. So yes, if you sign up, we stand to make a little money. But we promise you, they are a serious upgrade on your current provider, whoever they are!)
Andy Capaloff
Latest posts by Andy Capaloff (see all)
- The Art of Asking Questions [Interactive] - October 17, 2023
- The Metaverse Is Not Dead. It’s Resting! - September 6, 2023
- How Can You Hire For Jobs That Nobody Has Experience In? Aptitude! - June 13, 2023